

The complete guide
How To Choose A Countertop Wine Rack That Actually Gets Used
The problem with keeping wine in cupboards
Wine has a habit of ending up wherever there is a gap. A couple of bottles behind the cereal, one standing upright next to the kettle, two more in a box on the laundry floor that you keep meaning to deal with. None of it is a disaster, but it adds up to three small annoyances. You cannot see what you own, bottles get knocked over, and the nice one you were saving for a reason gets opened by accident on a Tuesday.
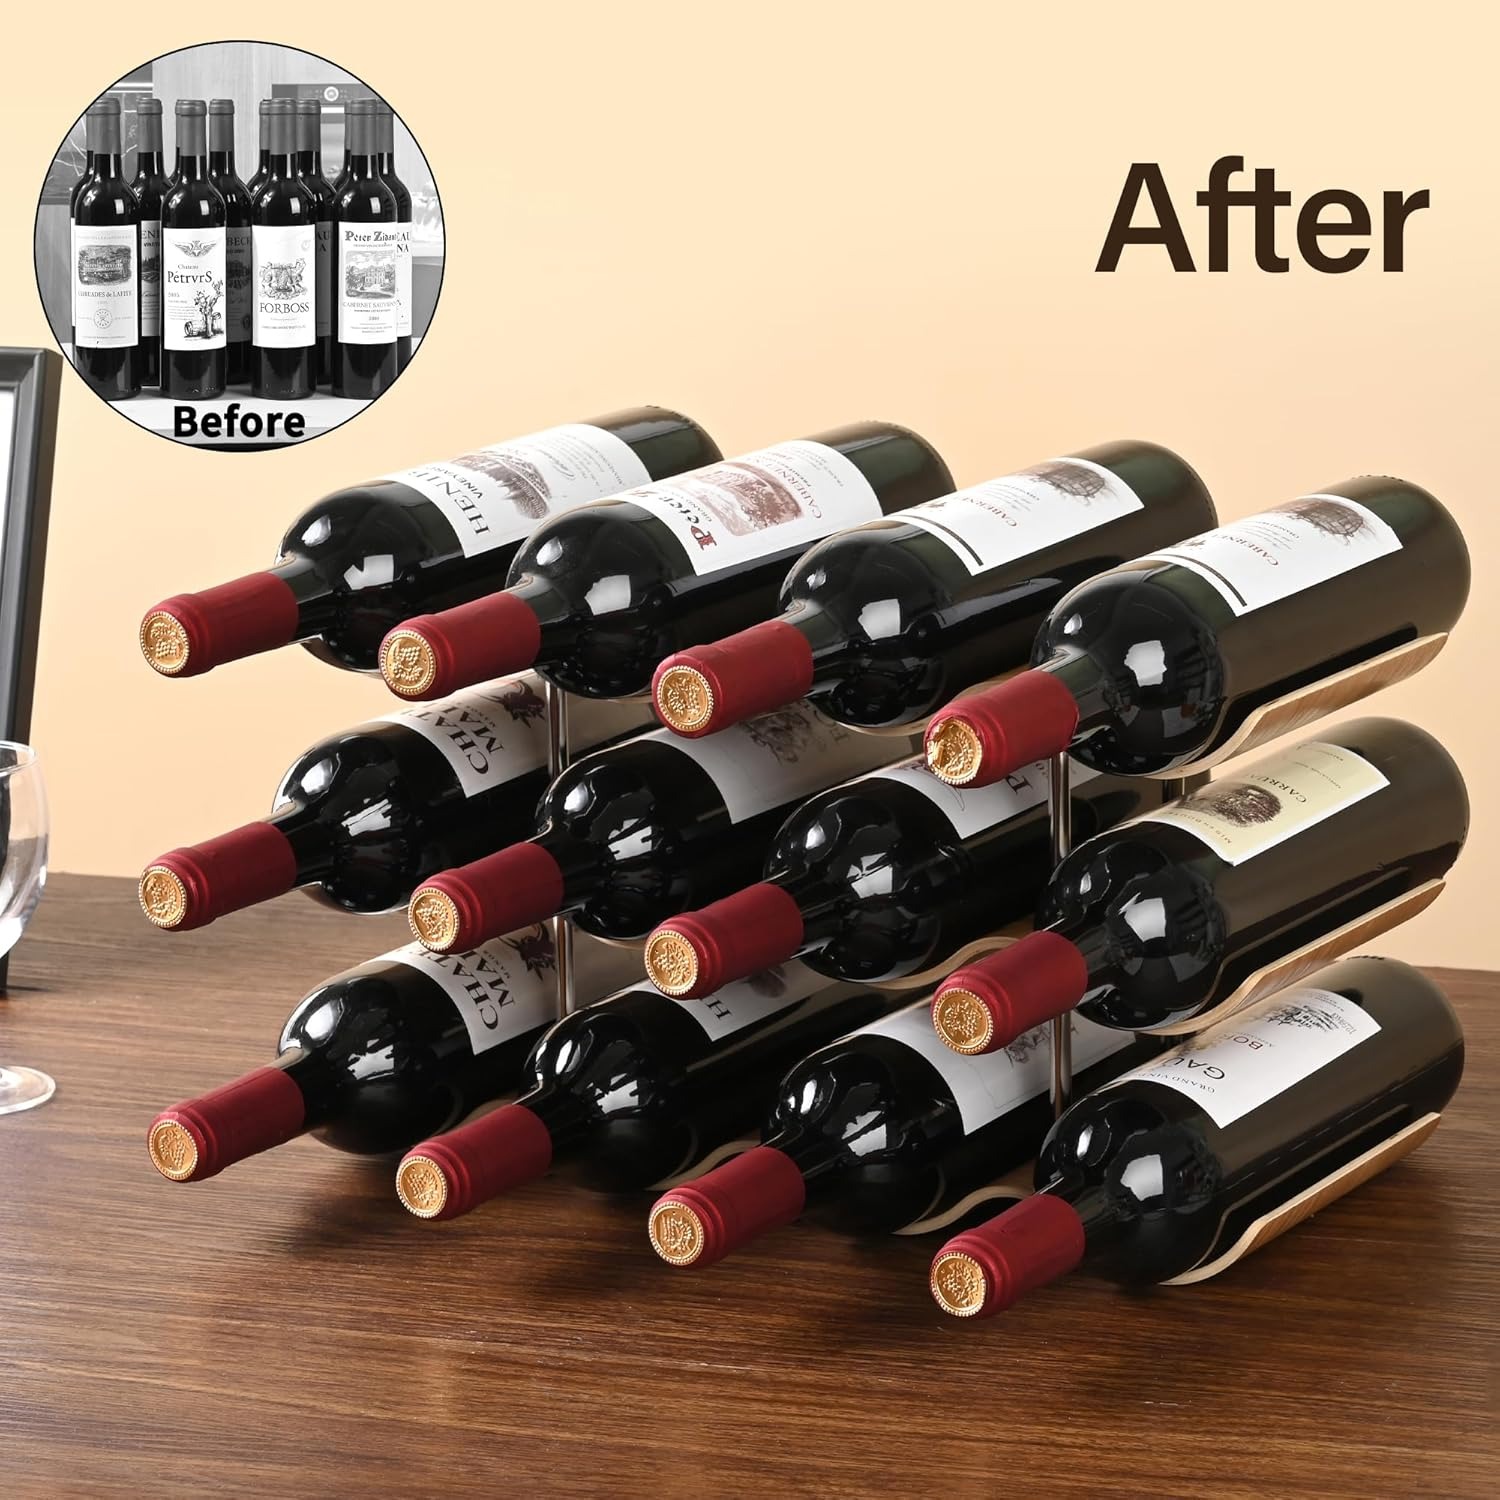
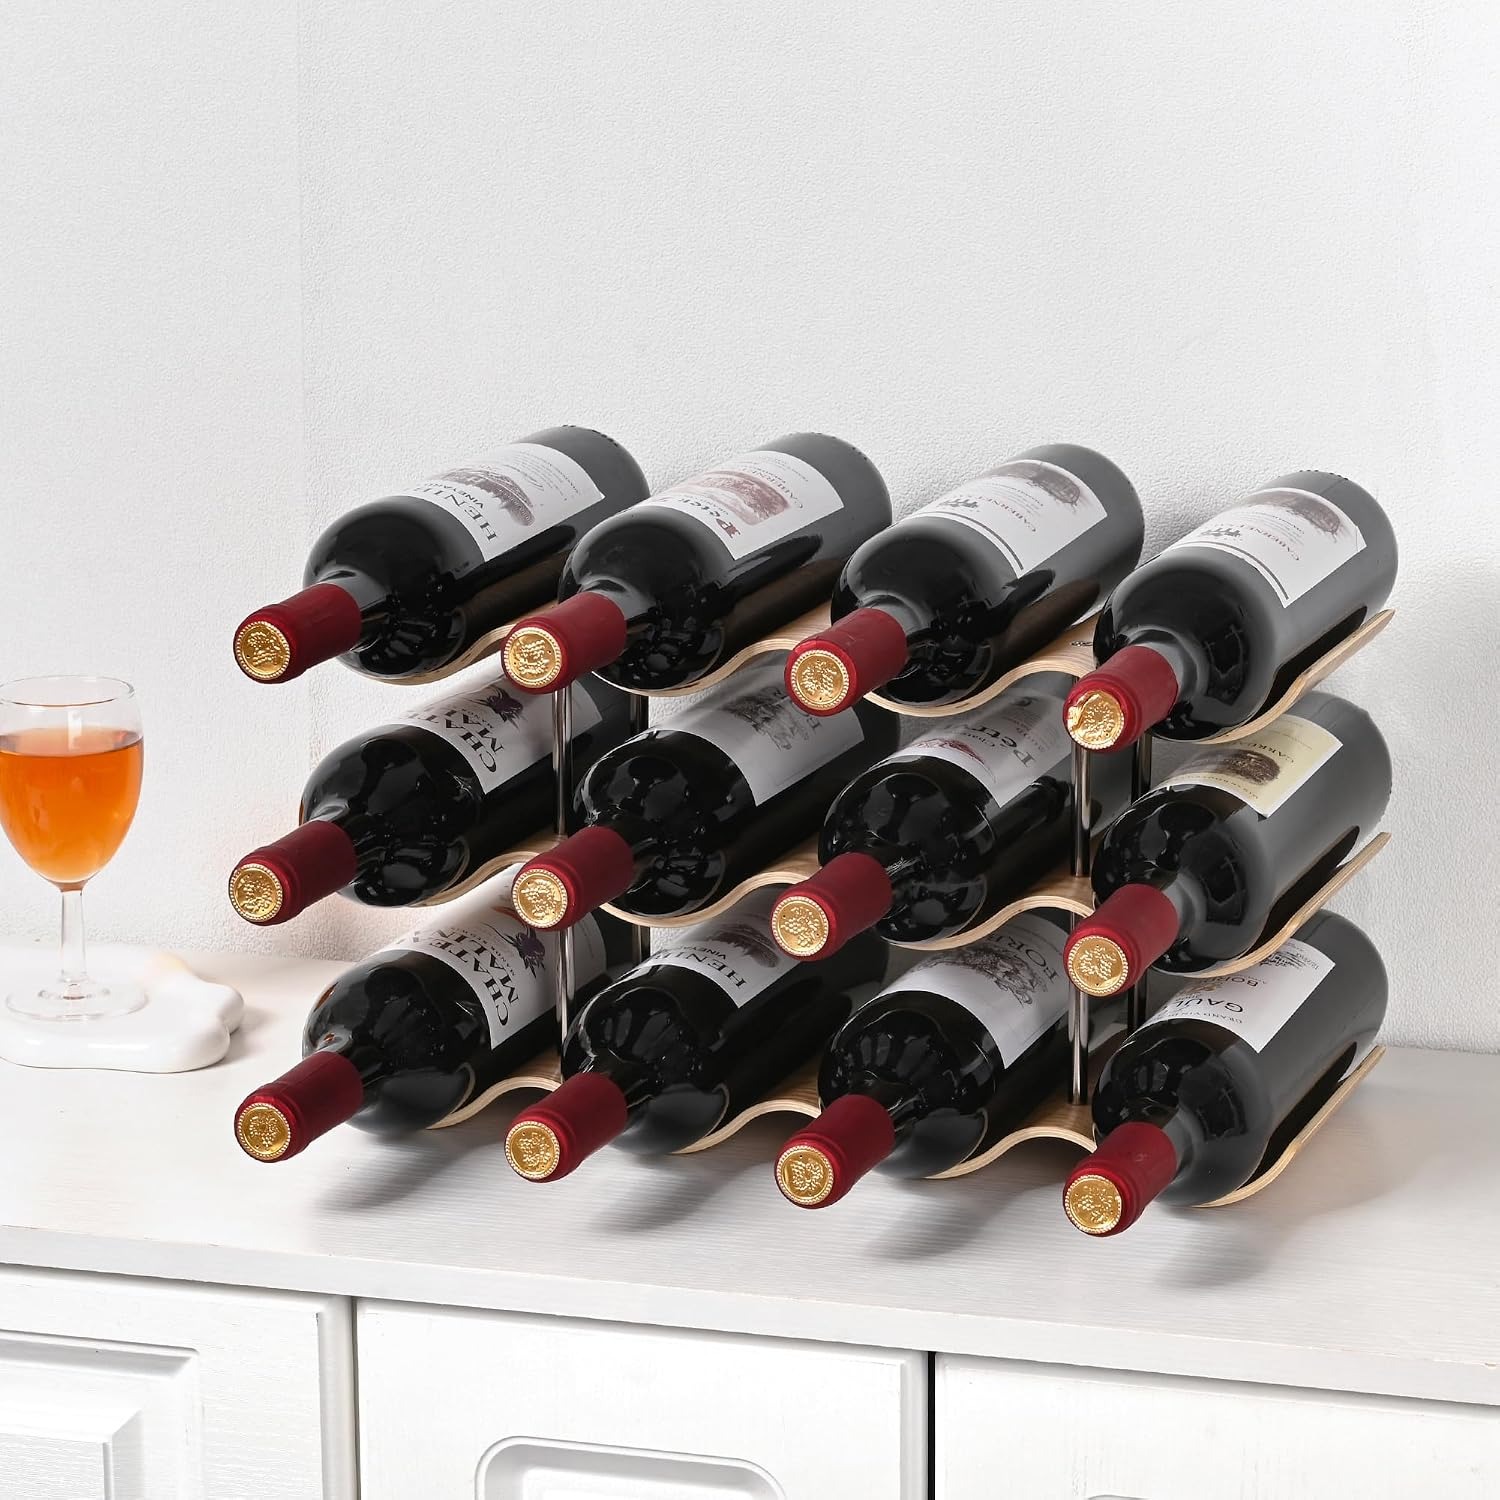
A countertop wine rack solves all three at once by giving the bottles a single visible home. That is less glamorous than a cellar and far more useful day to day. You open a cupboard, see twelve labels facing you, and pick. No digging, no guessing, no rolling bottles.
The catch is that plenty of racks look good in a photo and fail in a kitchen. They are too deep for the worktop, too tall for the shelf, too wobbly once loaded, or they only take one bottle shape. Knowing what to check saves you from that.
How a wavy timber rack holds bottles
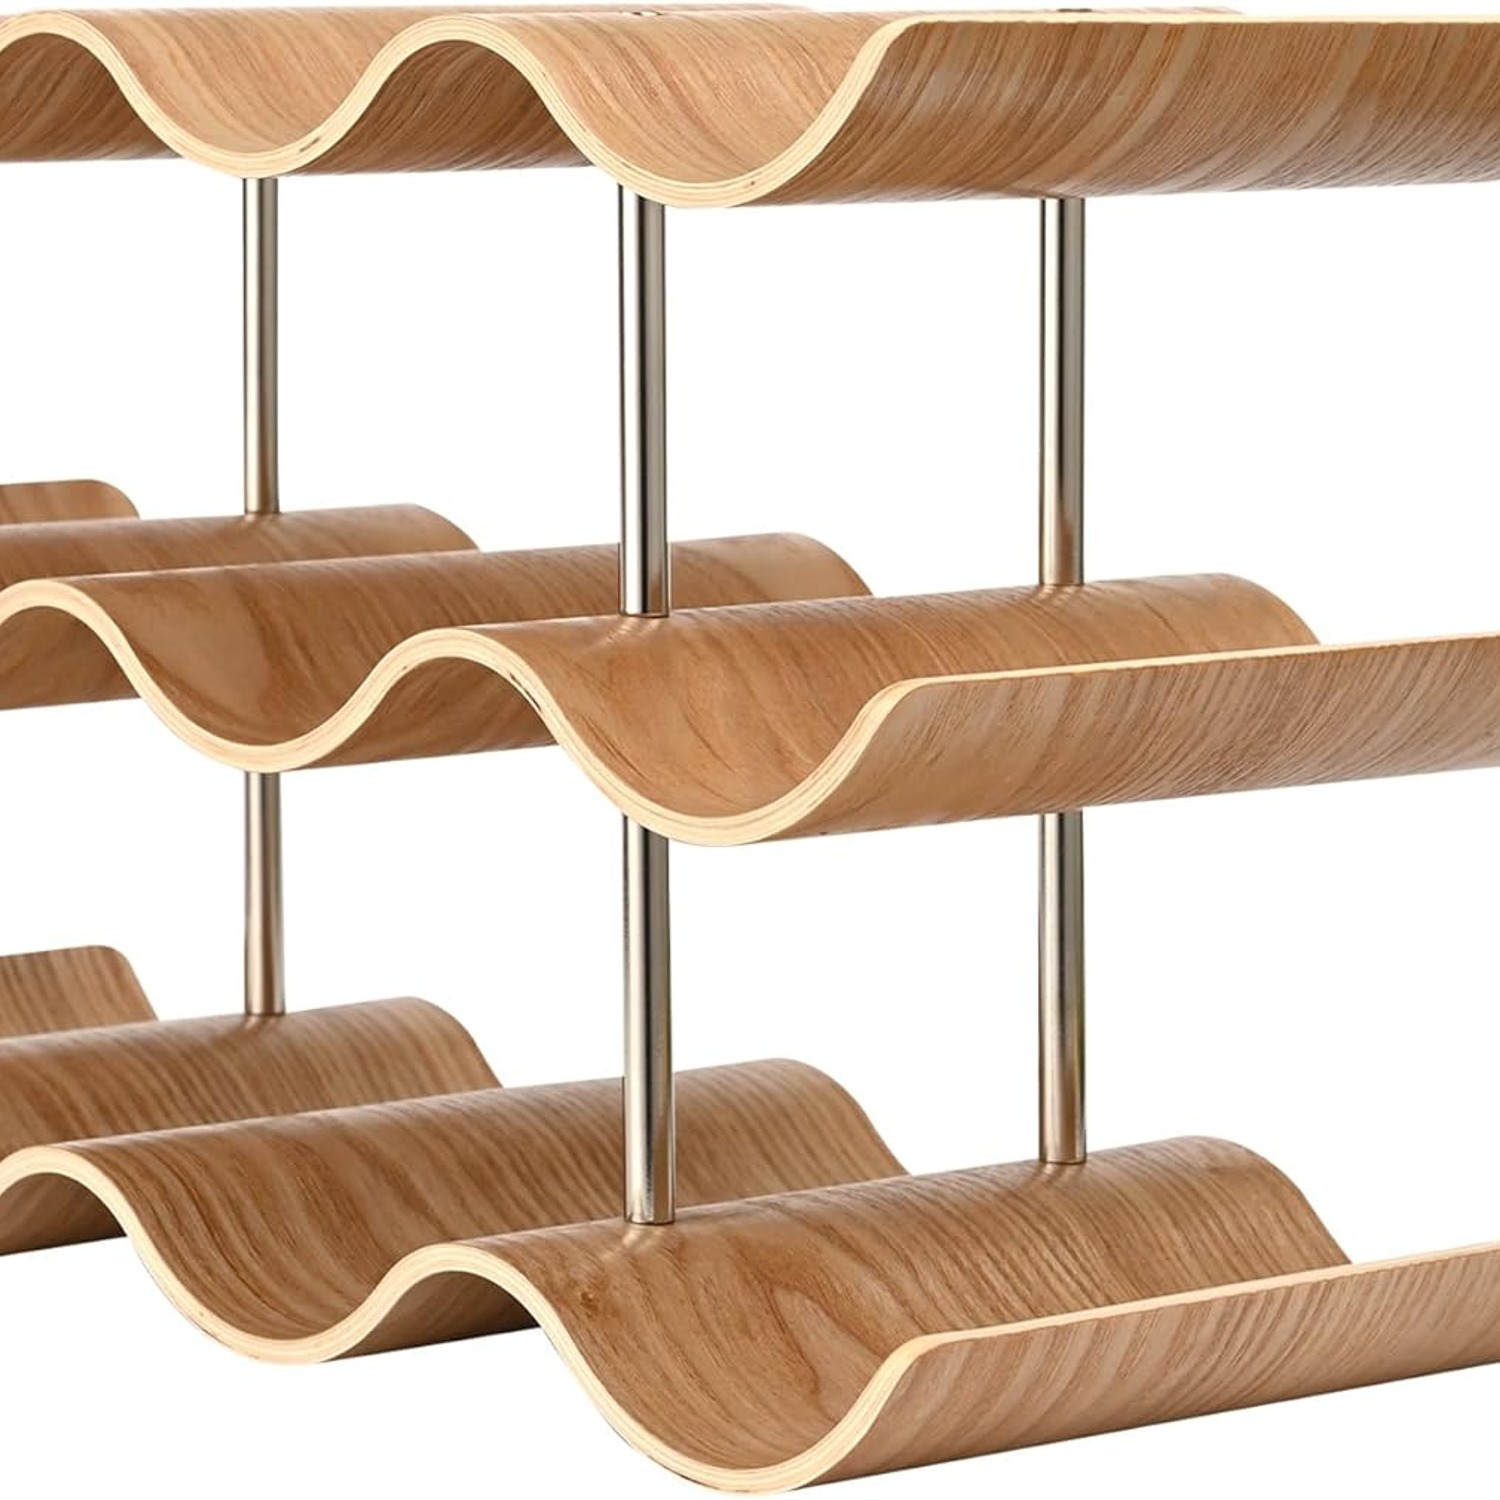
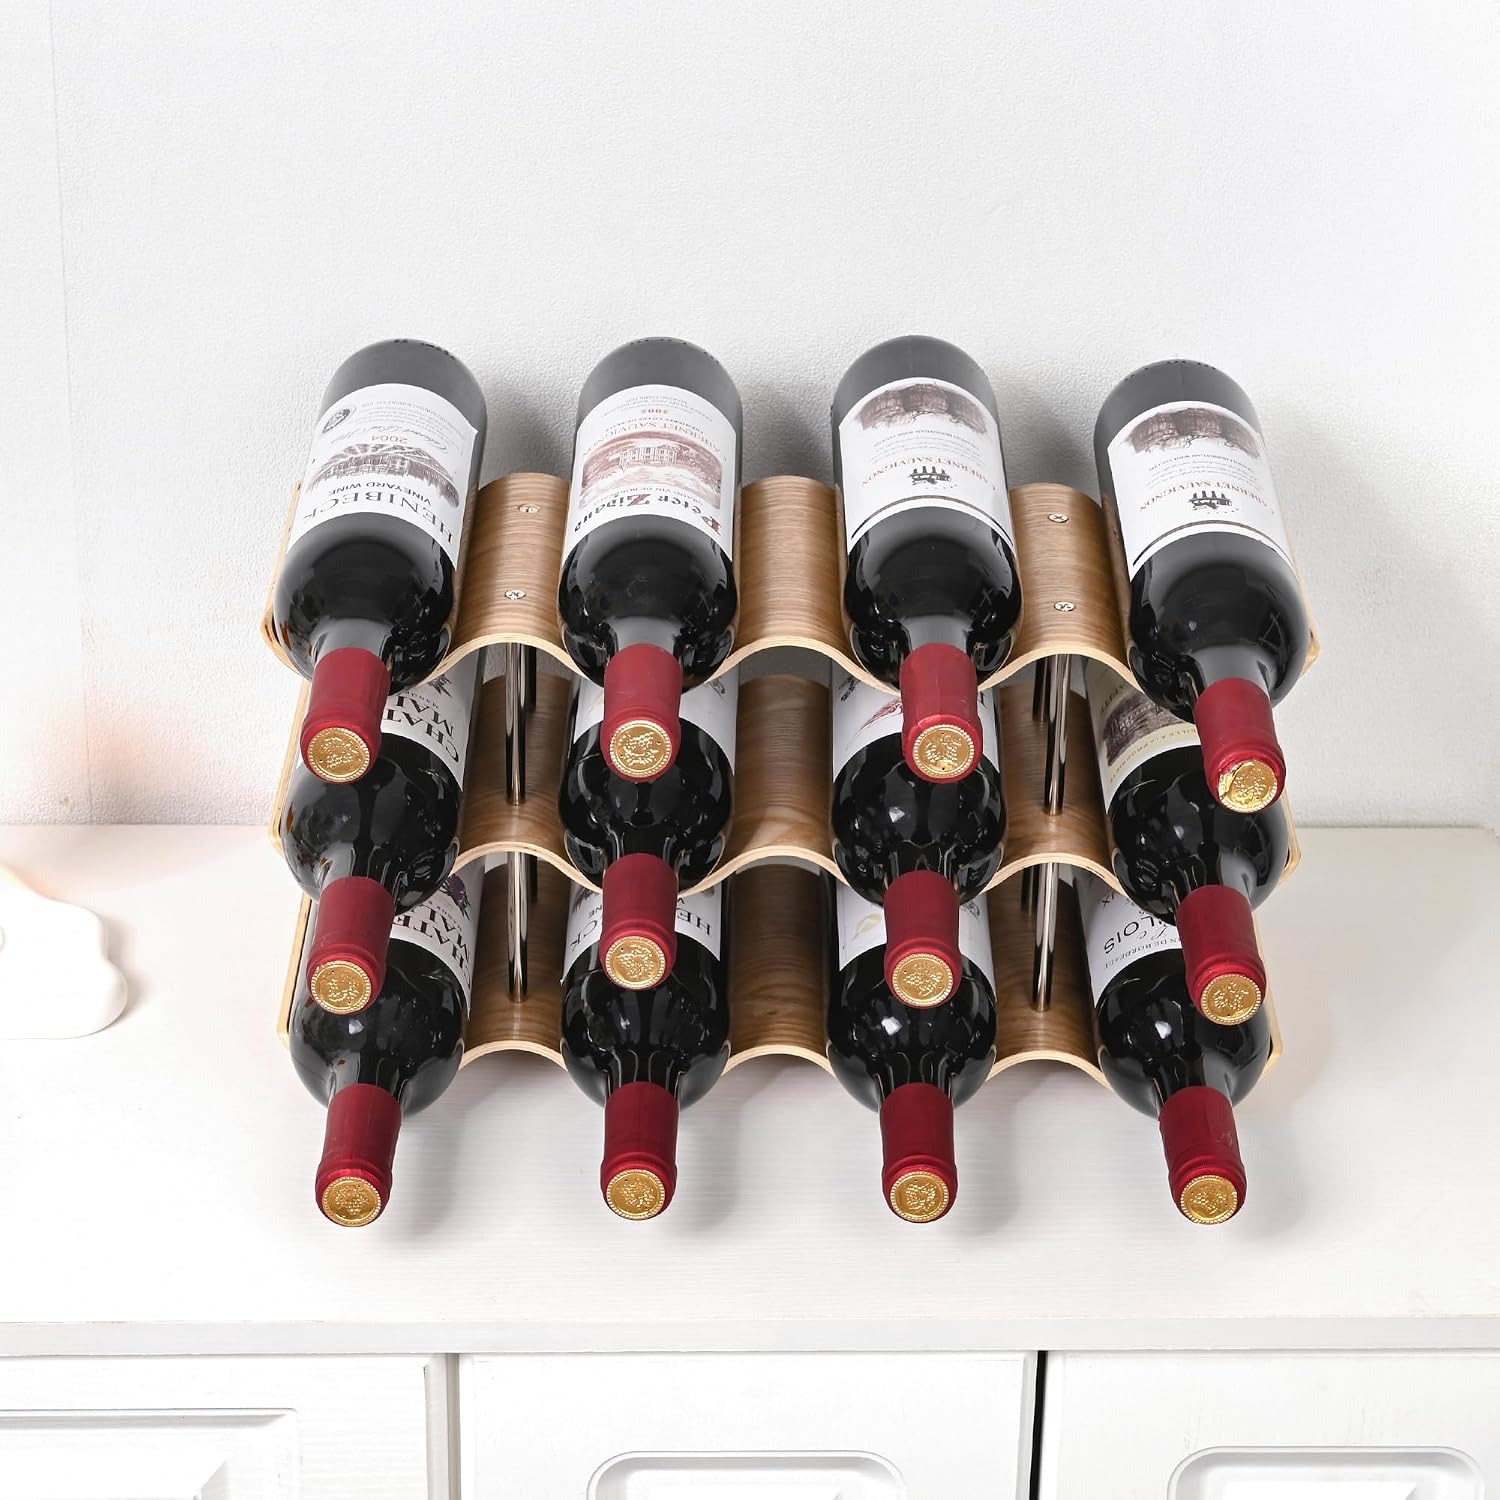
The wave is not just styling. Straight shelves need dividers, pegs or cradles to keep bottles still, and those add bulk and hard edges. Here, the timber board itself is pressed into a curve at high temperature, and every dip in that curve becomes a shaped trough. A bottle laid across it settles into the low point and stays there.
That means gravity does the work. Nothing clips, nothing tensions and nothing wears out. Bump the worktop and the bottle rocks slightly then settles back where it was. The same shape also stops bottles touching each other, which is why a rack like this is quieter than a wine box when you pull one out.
Holding the three tiers together are eight silver metal nut struts with Phillips screws running through them. Those struts set the spacing between the tiers and, more importantly, keep the whole frame square under load. Timber alone would flex. Timber plus a metal spine does not.
Reading the capacity properly
Twelve bottles sounds simple, but the split matters more than the total. On this rack the lower two tiers carry eight slots sized for standard bottles. The top tier carries four wider slots, meant for oversized bottles.
That is a deliberate choice, and a sensible one. Most households own mostly standard 750ml bottles with a few outliers, usually sparkling, champagne or a heavy-bottomed red with a deep punt. Those fatter bottles are exactly what ruins a rack with twelve identical slots. You wedge one in, it sticks, and after a while you stop using the rack properly.
So before you buy, do a rough count. If you keep more than four oversized bottles at a time, you may want two racks or a dedicated spot elsewhere for the big ones. If your collection is mostly standard with a couple of specials, this layout fits neatly.
Measuring your space
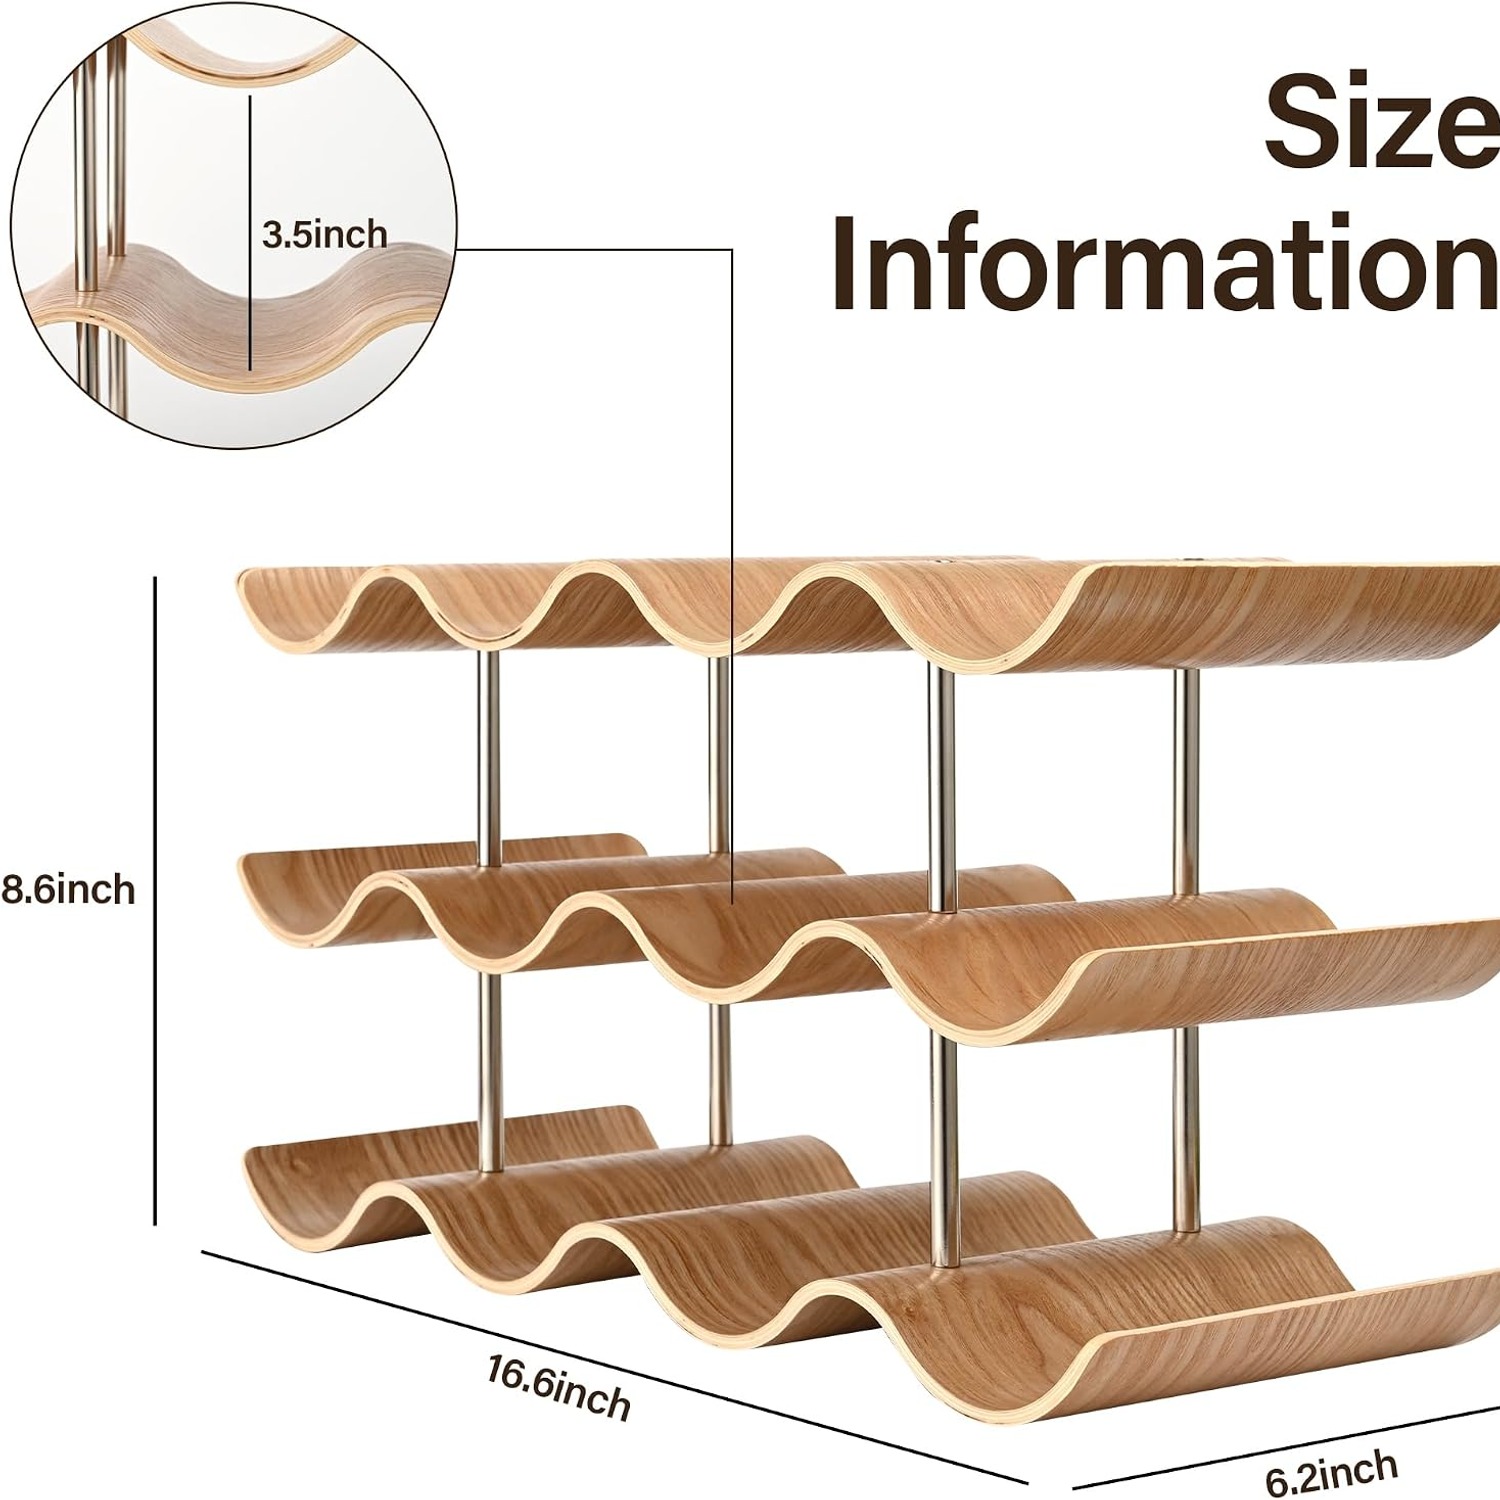
This is where most people get caught out. The finished rack is 42.2cm wide, 15.7cm deep and 21.8cm tall. Three numbers, and all three matter.
Width is the obvious one. You need 42.2cm of clear worktop, shelf or cart. Measure the actual gap, not the whole worktop, because the kettle and the toaster have already claimed their share.
Depth is the sneaky one. The rack is 15.7cm front to back, but the bottles are longer than that and stick out at the ends. On a standard kitchen worktop that is fine. Inside a shallow cupboard it may not be, so check that your cupboard is deep enough for a bottle laid sideways, not just for the rack frame.
Height is easy to forget. At 21.8cm it will clear most under-cabinet gaps and most pantry shelves, but if you are sliding it onto a shelf you want a few centimetres spare so you can lift bottles out rather than drag them.
Who it suits
This size and style tends to work best for a few kinds of household.
Renters and apartment dwellers get the most out of it, because nothing is fixed to a wall and the rack moves house in a box. Small kitchens do well too, since twelve bottles in 42cm of width is a decent trade for the worktop space it uses.
Casual drinkers who keep a rotating dozen on hand find it the right size. So do people setting up a bar cart or a drinks corner, where the rack doubles as the display. Someone building a serious cellar will outgrow twelve bottles quickly, and that is fine, this is for the working stash rather than long storage.
As a gift it is an easy win, because you do not have to know anything about the recipient's taste in wine to get it right.
Putting it together
Assembly is listed as required, and it is genuinely quick. The box has three wavy boards, eight double-pass nut struts, eight Phillips screws and an instruction sheet. You stand the boards in order, run the struts between them and tighten the screws.
A few small tips make it go smoothly. Work on a flat floor or table so the boards sit true. Start every screw by hand before tightening any of them fully, so the frame can pull itself square. Then go round and firm them all up in a couple of passes rather than cranking one corner tight first.
One thing to note is that a Phillips screwdriver is not in the box. Have one ready. If you use a power driver, keep it on a low torque setting so you do not over-drive a screw into the timber.
Looking after it
Care is refreshingly simple. Wipe it with a dry cloth. That is the manufacturer's instruction and for good reason, since timber and standing water do not mix.
For a sticky ring from a dribbled bottle, use a barely damp cloth and dry it straight afterwards. Skip the abrasive pads, the bleach sprays and anything solvent based, all of which will dull the polished finish.
Keep the rack out of direct sunlight if you can. Sun fades timber unevenly, and it is not doing your wine any favours either. Also avoid parking it right beside a kettle, a steaming pot or a dishwasher vent, where repeated humidity can work on the wood over time.
Every few months, give the eight screws a quick check. Any frame that gets loaded and unloaded repeatedly will loosen slightly. Half a turn with a screwdriver keeps it tight and is the single best thing you can do for a long life.
Small habits that help
Load from the bottom tier up. A low centre of gravity is more stable, and it means you are not reaching over full top slots while settling a heavy bottle underneath.
Put the oversized bottles up top where the wider slots are, rather than trying to force them below. Slide bottles in rather than dropping them, which keeps labels crisp.
If your worktop is a soft timber or a stone you are protective of, a few felt pads under the base will stop any scuffing when you shift the rack to clean.
The short version
A wavy wooden wine rack is a straightforward fix for a scattered collection. Twelve bottles, three curved tiers, eight standard slots below and four wider ones on top for the sparkling. The troughs stop bottles rolling without any clips or straps, and the metal struts keep the frame steady once it is full.
Check your width (42.2cm), your depth (15.7cm plus bottle overhang) and your height (21.8cm) before ordering. Have a Phillips screwdriver handy for the few minutes of assembly. Wipe it dry, keep it out of the sun, and nip up the screws occasionally.
Do that and you end up with the thing most wine storage promises and rarely delivers, which is knowing exactly what you own and being able to reach it without moving anything else.